
Any souvenir fridge magnet from your trip will work.
NFC photo magnet guide
Pick it up.Relive the trip.
Hide an NFC sticker behind a souvenir magnet, then pick it up and tap it with your phone to open the matching Google Photos album in seconds.
Before you begin
Four things.
One magnet can open one album. Repeat the same setup for every destination you want to bring to life.
A standard NFC sticker that works with phones.
Buy NFC stickers ↗A finished trip album with link sharing enabled.
An iPhone for the automatic Shortcut, or an NFC-capable Android phone.
Choose your phone
Two setup paths.
The iPhone method matches the Reel and opens automatically. The Android method stores the album link directly on the NFC tag.
The automatic method
Set it up on iPhone.
Copy the album link
Open the trip album in Google Photos. Tap Share, then Get link or Copy link. Paste it into a Safari Private tab once and confirm that the correct album opens.
Prepare the NFC tag
The Shortcut identifies the NFC tag itself, so the tag does not need a URL written onto it. If you previously wrote a link to the tag, open NFC Tools → Other → Erase tag.
Create the NFC automation
- Open Shortcuts and tap Automation.
- Tap + or New Automation, then choose NFC.
- Tap Scan and hold the top of your iPhone near the NFC sticker.
- Name it after the destination—for example, “Japan 2026”.
- Select Run Immediately and turn off Notify When Run if shown.
Add the album action
- On the next screen, tap the Search field.
- Search for Open URLs and select it—not Open App.
- Paste the complete Google Photos link, including https://.
- Tap Done.
Attach, pick up and tap
Stick the NFC tag behind the souvenir, beside the magnet puck rather than directly over it. Put the souvenir on your refrigerator for display. To use it, pick it up, keep the iPhone awake and tap the top of the phone against the souvenir’s front.
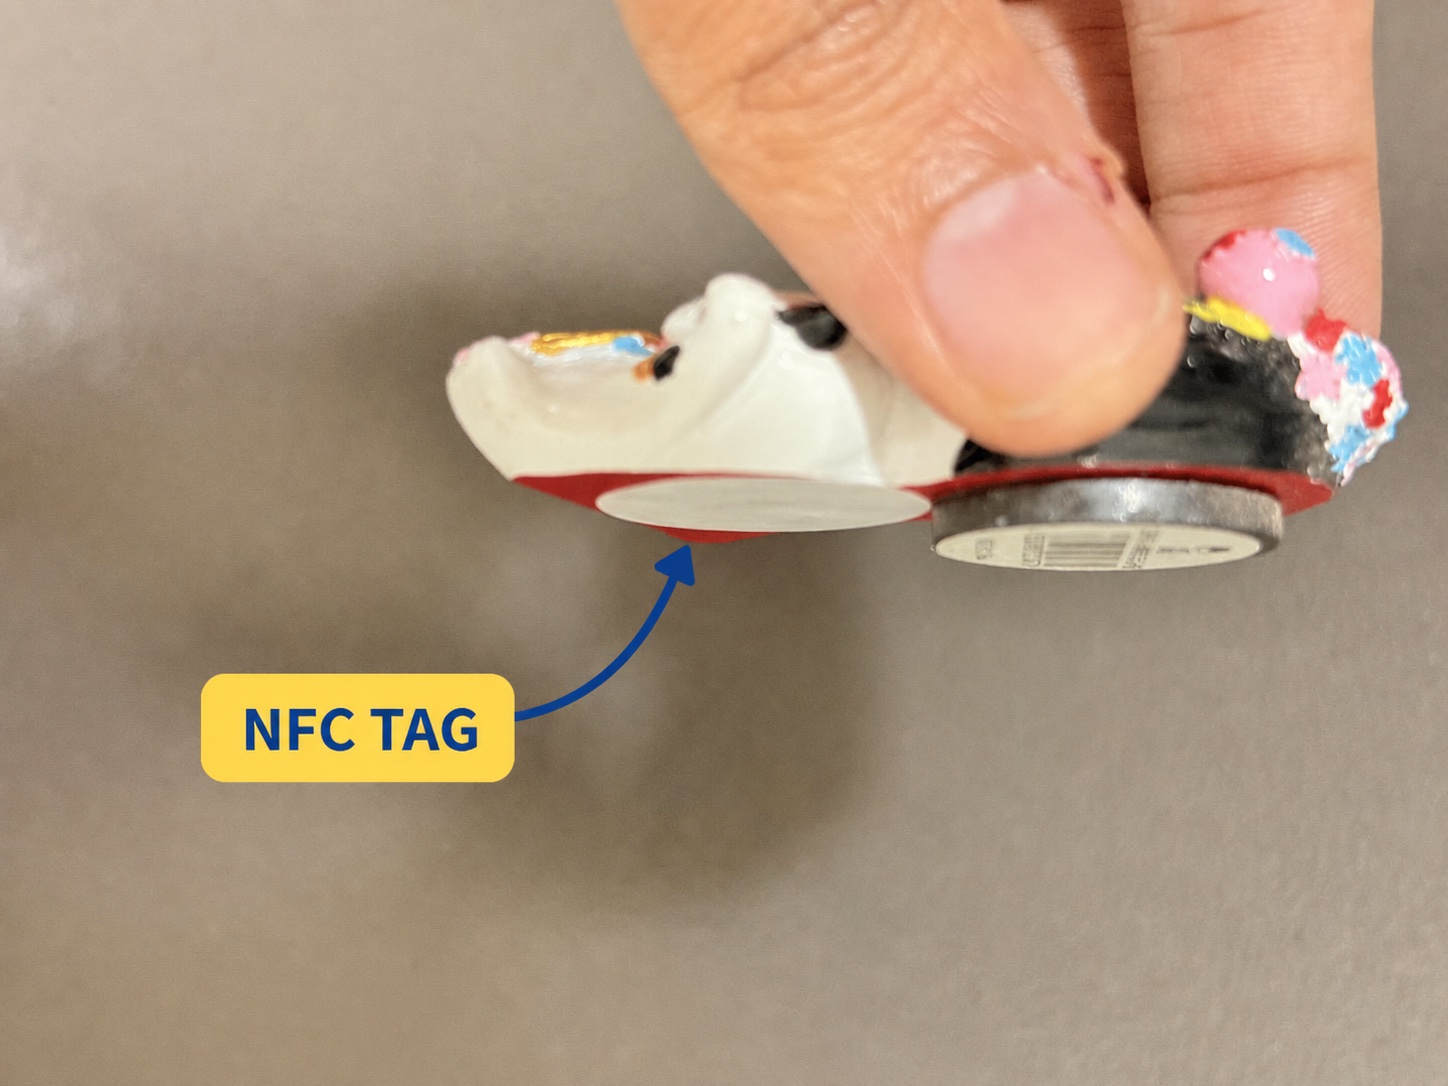
The matching Google Photos album should open automatically.
The written-link method
Set it up on Android.
Copy the Google Photos link
Open the finished album, tap Share, then create or copy its sharing link. Test it once in a private browser window.
Install NFC Tools
Install the free NFC Tools app from Wakdev and ensure NFC is enabled in your phone’s settings.
Write the link to the tag
- Open NFC Tools and select Write.
- Tap Add a record → URL / URI.
- Paste the album link and validate it.
- Tap Write / X Bytes.
- Hold the phone’s NFC antenna near the sticker until writing completes.
Test it away from the fridge
Close NFC Tools, keep the phone awake and scan the loose tag. The Google Photos album should open, or the phone may display a link confirmation depending on its Android version and settings.
Attach, pick up and tap
Stick the tag behind the souvenir, beside its magnetic puck. Display it normally, but pick the souvenir up before scanning so the refrigerator’s metal cannot interfere with the NFC antenna.
Quick fixes
If it does not scan.
It works in my hand, but not on the refrigerator
The refrigerator’s steel surface is interfering with the tag. Pick the souvenir up before scanning, or switch to an on-metal/ferrite-backed NFC tag.
My iPhone only shows “Open in Google Photos”
The album URL is still written directly onto the tag. Erase the tag in NFC Tools, then use the iPhone Shortcuts automation above for automatic opening.
The wrong album opens
Edit the corresponding automation on iPhone and replace its URL. On Android, erase the tag and write the correct album URL again.
The phone does not detect the tag at all
Remove a thick phone case, keep the screen awake and move the phone slowly around the souvenir to locate its NFC antenna. On iPhone, scan using the top edge of the phone.
That is it
Pick. Tap. Relive.
Repeat the setup with a different tag and album for every destination on your refrigerator.